<configuration>
<connectionStrings>
<add name="conString" connectionString="Data Source=(local);Initial Catalog = Employee;Integrated Security=True" />
</connectionStrings>
</configuration>
using System;
using System.Data;
using System.Data.SqlClient;
using System.Configuration;
using System.Web.UI.WebControls;
using System.Web.UI;
public partial class Default : System.Web.UI.Page
{
SqlConnection conn;
SqlDataAdapter adapter;
DataSet ds;
SqlCommand cmd;
string cs = ConfigurationManager.ConnectionStrings["conString"].ConnectionString;
protected void Page_Load(object sender, EventArgs e)
{
if (!IsPostBack)
{
PopulateDetailView();
}
}
protected void PopulateDetailView()
{
try
{
conn = new SqlConnection(cs);
adapter = new SqlDataAdapter("select * from tblEmps", conn);
ds = new DataSet();
adapter.Fill(ds);
DetailsView1.DataSource = ds;
DetailsView1.DataBind();
}
catch (Exception ex)
{
Label1.Text = "ERROR :: " + ex.Message;
}
}
protected void DetailsView1_PageIndexChanging(object sender, DetailsViewPageEventArgs e)
{
DetailsView1.PageIndex = e.NewPageIndex;
PopulateDetailView();
}
protected void DetailsView1_ModeChanging(object sender, DetailsViewModeEventArgs e)
{
DetailsView1.ChangeMode(e.NewMode);
PopulateDetailView();
}
}

<PagerSettings
Mode="NextPreviousFirstLast"
FirstPageText="[First Record]"
LastPageText="[Last Record]"
NextPageText="[Next Record]"
PreviousPageText="[Previous Record]" />
protected void DetailsView1_ItemUpdating(object sender, DetailsViewUpdateEventArgs e )
{
int ID = Convert.ToInt32(DetailsView1.Rows[0].Cells[1].Text);
TextBox txtName = DetailsView1.Rows[1].Cells[1].Controls[0] as TextBox;
TextBox txtGender = DetailsView1.Rows[2].Cells[1].Controls[0] as TextBox;
TextBox txtSalary = DetailsView1.Rows[3].Cells[1].Controls[0] as TextBox;
TextBox txtAddress = DetailsView1.Rows[4].Cells[1].Controls[0] as TextBox;
TextBox txtDepartmentID = DetailsView1.Rows[5].Cells[1].Controls[0] as TextBox;
string updateQuery = "update tblEmps set name='" + txtName.Text + "',gender='"
+ txtGender.Text + "',Salary=" + txtSalary.Text + ",Address='" + txtAddress.Text + "',DepID="
+ txtDepartmentID.Text + " where EmpID=" + ID;
conn = new SqlConnection(cs);
cmd = new SqlCommand(updateQuery, conn);
conn.Open();
cmd.ExecuteNonQuery();
conn.Close();
DetailsView1.ChangeMode(DetailsViewMode.ReadOnly);
PopulateDetailView();
}
<Fields>
<asp:TemplateField HeaderText="Title:">
<EditItemTemplate>
<asp:TextBox id="txtName" Text='<%# Bind("Name") %>' runat="server" />
<asp:RequiredFieldValidator id="reqName" ControlToValidate=" txtName "
Text="(required)" Display="Dynamic" Runat="server" />
</EditItemTemplate>
</asp:TemplateField>
</Fields>
protected void DetailsView1_ItemInserting(object sender, DetailsViewInsertEventArgs e)
{
TextBox txtEmpID = DetailsView1.Rows[0].Cells[1].Controls[0] as TextBox;
TextBox txtName = DetailsView1.Rows[1].Cells[1].Controls[0] as TextBox;
TextBox txtGender = DetailsView1.Rows[2].Cells[1].Controls[0] as TextBox;
TextBox txtSalary = DetailsView1.Rows[3].Cells[1].Controls[0] as TextBox;
TextBox txtAddress = DetailsView1.Rows[4].Cells[1].Controls[0] as TextBox;
TextBox txtDepartmentID = DetailsView1.Rows[5].Cells[1].Controls[0] as TextBox;
string insertQuery = "insert into tblEmps values("+txtEmpID.Text+",'"+txtName.Text+"',
'"+txtGender.Text+"',"+txtSalary.Text+",'"+txtAddress.Text+"',"+txtDepartmentID.Text+")";
conn = new SqlConnection(cs);
cmd = new SqlCommand(insertQuery, conn);
conn.Open();
cmd.ExecuteNonQuery();
conn.Close();
DetailsView1.ChangeMode(DetailsViewMode.ReadOnly);
PopulateDetailView();
}
protected void DetailsView1_ItemDeleting(object sender, DetailsViewDeleteEventArgs e)
{
int ID = Convert.ToInt32(DetailsView1.Rows[0].Cells[1].Text);
string deleteQuery = "delete tblEmps where empid = "+ID;
conn = new SqlConnection(cs);
cmd = new SqlCommand(deleteQuery, conn);
conn.Open();
cmd.ExecuteNonQuery();
conn.Close();
DetailsView1.ChangeMode(DetailsViewMode.ReadOnly);
PopulateDetailView();
}
<style type="text/css">
.noRecord
{
background-color: #b6ff00;
padding:15px;
font-family: Arial;
}
.noRecord h1
{
color: red;
font-size: 15px;
font-weight: bold;
}
</style>
<EmptyDataTemplate>
<div class="noRecord">
<h1>No Matching Record!</h1>
Please select a different record.
</div>
</EmptyDataTemplate>

using System;
using System.Data;
using System.Data.SqlClient;
using System.Configuration;
using System.Web.UI.WebControls;
using System.Web.UI;
public partial class FormViewDemo : System.Web.UI.Page
{
SqlConnection conn;
SqlDataAdapter adapter;
DataSet ds;
SqlCommand cmd;
string cs = ConfigurationManager.ConnectionStrings["conString"].ConnectionString;
protected void Page_Load(object sender, EventArgs e)
{
if (!IsPostBack)
{
PopulateFormView();
}
}
protected void PopulateFormView()
{
try
{
conn = new SqlConnection(cs);
adapter = new SqlDataAdapter("select * from tblEmps", conn);
ds = new DataSet();
adapter.Fill(ds);
FormView1.DataSource = ds;
FormView1.DataBind();
}
catch (Exception ex)
{
Label1.Text = "ERROR :: " + ex.Message;
}
}
protected void FormView1_ModeChanging(object sender, FormViewModeEventArgs e)
{
FormView1.ChangeMode(e.NewMode);
PopulateFormView();
}
}
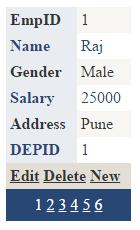
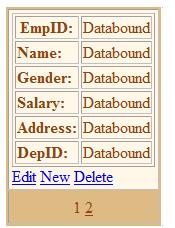
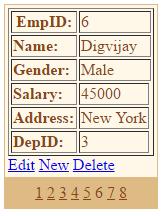
<ItemTemplate>
<table border="1">
<tr>
<th><b>EmpID:</b></th>
<td ><%# Eval("EmpID") %></td>
</tr>
<tr>
<td><b>Name:</b></td>
<td ><%# Eval("Name") %></td>
</tr>
<tr>
<td><b>Gender:</b></td>
<td ><%#Eval("Gender") %></td>
</tr>
<tr>
<td><b>Salary:</b></td>
<td><%# Eval("Salary") %></td>
</tr>
<tr>
<td><b>Address:</b></td>
<td><%# Eval("Address") %></td>
</tr>
<tr>
<td><b>DepID:</b></td>
<td><%#Eval("DepID") %>
</tr>
</table>
<asp:LinkButton ID="lnkEdit" Text="Edit" CommandName="Edit" runat="server" />
<asp:LinkButton ID="lnkNew" Text="New" CommandName="New" runat="server" />
<asp:LinkButton ID="lnkDelete" Text="Delete" CommandName="Delete" runat="server" />
</ItemTemplate>
protected void FormView1_PageIndexChanging(object sender, FormViewPageEventArgs e)
{
FormView1.PageIndex = e.NewPageIndex;
PopulateFormView();
}
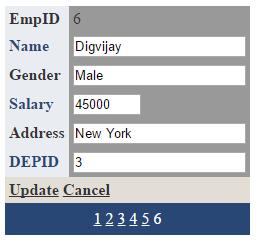
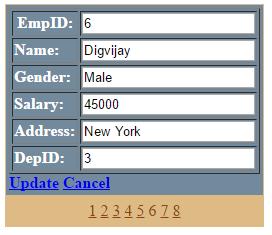
<EditItemTemplate>
<table border="1">
<tr>
<th><b>EmpID:</b></th>
<td><asp:TextBox ID="txtEmpID" Text='<%# Bind("EmpID") %>' runat="Server" /></td>
</tr>
<tr>
<td><b>Name:</b></td>
<td><asp:TextBox ID="txtName" Text='<%# Bind("Name") %>' runat="Server" /></td>
</tr>
<tr>
<td><b>Gender:</b></td>
<td><asp:TextBox ID="txtGender" Text='<%# Bind("Gender") %>' runat="Server"/> </td>
</tr>
<tr>
<td><b>Salary:</b></td>
<td><asp:TextBox ID="txtSalary" Text='<%# Bind("Salary") %>' runat="Server" /></td>
</tr>
<tr>
<td><b>Address:</b></td>
<td><asp:TextBox ID="txtAddress" Text='<%# Bind("Address") %>' runat="Server" /></td>
</tr>
<tr>
<td><b>DepID:</b></td>
<td><asp:TextBox ID="txtDeptID" Text='<%# Bind("DepID") %>' runat="Server" /></td>
</tr>
</table>
<asp:LinkButton ID="lnkUpdate" Text="Update" CommandName="Update" runat="server" />
<asp:LinkButton ID="lnkCancel" Text="Cancel" CommandName="Cancel" runat="server" />
</EditItemTemplate>
protected void FormView1_ItemUpdating(object sender, FormViewUpdateEventArgs e)
{
int ID = Convert.ToInt32((FormView1.FindControl("txtEmpID") as TextBox).Text);
string empName = (FormView1.FindControl("txtName") as TextBox).Text;
string empGender = (FormView1.FindControl("txtGender") as TextBox).Text;
double empSalary = Convert.ToDouble((FormView1.FindControl("txtSalary") as TextBox).Text);
string empAddress = (FormView1.FindControl("txtAddress") as TextBox).Text;
int depID = Convert.ToInt32((FormView1.FindControl("txtDeptID") as TextBox).Text);
string updateQuery = "update tblEmps set name='"+empName+"',
gender='"+empGender+"',salary="+empSalary+",address='"+empAddress+"',
depid="+depID+" where empid="+ID;
conn = new SqlConnection(cs);
cmd = new SqlCommand(updateQuery, conn);
conn.Open();
cmd.ExecuteNonQuery();
conn.Close();
FormView1.ChangeMode(FormViewMode.ReadOnly);
PopulateFormView();
}
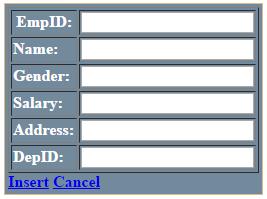
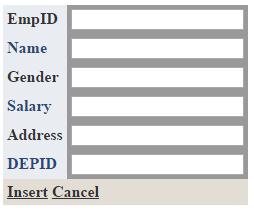
<InsertItemTemplate>
<table border="1">
<tr>
<th><b>EmpID:</b></th>
<td><asp:TextBox ID="txtEmpID" Text='<%# Bind("EmpID") %>' runat="Server" /></td>
</tr>
<tr>
<td><b>Name:</b></td>
<td><asp:TextBox ID="txtName" Text='<%# Bind("Name") %>' runat="Server" /></td>
</tr>
<tr>
<td><b>Gender:</b></td>
<td><asp:TextBox ID="txtGender" Text='<%# Bind("Gender") %>' runat="Server" /> </td>
</tr>
<tr>
<td><b>Salary:</b></td>
<td><asp:TextBox ID="txtSalary" Text='<%# Bind("Salary") %>' runat="Server" /></td>
</tr>
<tr>
<td><b>Address:</b></td>
<td><asp:TextBox ID="txtAddress" Text='<%# Bind("Address") %>' runat="Server" /> </td>
</tr>
<tr>
<td><b>DepID:</b></td>
<td><asp:TextBox ID="txtDeptID" Text='<%# Bind("DepID") %>' runat="Server" /></td>
</tr>
</table>
<asp:LinkButton ID="lnkInsert" Text="Insert" CommandName="Insert" runat="server" />
<asp:LinkButton ID="lnkCancel" Text="Cancel" CommandName="Cancel" runat="server" />
</InsertItemTemplate>
protected void FormView1_ItemInserting(object sender, FormViewInsertEventArgs e)
{
string ID = (FormView1.FindControl("txtEmpID") as TextBox).Text;
string empName = (FormView1.FindControl("txtName") as TextBox).Text;
string empGender = (FormView1.FindControl("txtGender") as TextBox).Text;
double empSalary = Convert.ToDouble((FormView1.FindControl("txtSalary") as TextBox).Text);
string empAddress = (FormView1.FindControl("txtAddress") as TextBox).Text;
string depID = (FormView1.FindControl("txtDeptID") as TextBox).Text;
string insertQuery = "insert into tblEmps values("+ID+",'"+empName+"','"+empGender+"',
"+empSalary+",'"+empAddress+"',"+depID+")";
conn = new SqlConnection(cs);
cmd = new SqlCommand(insertQuery, conn);
conn.Open();
cmd.ExecuteNonQuery();
conn.Close();
FormView1.ChangeMode(FormViewMode.ReadOnly);
PopulateFormView();
}