Implement two create action method in EmployeeController .One create action method will decorate with HttpGet attribute and other with HttpPost attribute. Create action method withHttpGet attribute receives an HTTP GET request and renders the create view. It will only respond to get request. The other Create action method accepts the HTTP POST request from the create view. When we click the create button on view it will post the data to server. It also checks the validity of the data, adds data to the list, and redirects to the Index action method.
Now first create a method name as AddEmployee() in EmployeeBusinessLayer class as given below. This class we have already created in previous chapter. For more detail about EmployeeBusinessLayer class refer the previous chapter.
using System;
using System.Collections.Generic;
using System.Configuration;
using System.Data.SqlClient;
namespace DataLayer
{
public class EmployeeBusinessLayer
{
public IEnumerable<Employee> employees
{
get
{
// for this section code please refer previous example for access the
// employee data from database
}
}
public void AddEmployee(Employee emp)
{
string conString = ConfigurationManager.ConnectionStrings["EmpContext"].ConnectionString;
int empID = emp.EmpID;
string empName = emp.Name;
string empgender = emp.Gender;
double empSalary = emp.Salary;
string empAddress = emp.Address;
string strInsert = "insert into tblemp values("+empID+",'"+empName+"','"+empgender+"',"+empSalary+",'"+empAddress+"')";
using (SqlConnection con = new SqlConnection(conString))
{
SqlCommand cmd = new SqlCommand(strInsert, con);
con.Open();
cmd.ExecuteNonQuery();
}
}
}
}
Now update the EmployeeController class according to given below code.
using DataLayer;
using System;
using System.Collections.Generic;
using System.Linq;
using System.Web.Mvc;
namespace MvcBusinessObject.Controllers
{
public class EmployeeController : Controller
{
public ActionResult Index()
{
EmployeeBusinessLayer empBusLayer = new EmployeeBusinessLayer();
List<Employee> empList= empBusLayer.employees.ToList();
return View(empList);
}
[HttpGet]
public ActionResult Create()
{
return View();
}
[HttpPost]
public ActionResult Create(FormCollection formColl)
{
Employee empObj = new Employee();
empObj.EmpID = Convert.ToInt32(formColl["empID"]);
empObj.Name = formColl["Name"];
empObj.Gender = formColl["Gender"];
empObj.Salary =Convert.ToDouble( formColl["Salary"]);
empObj.Address = formColl["Address"];
EmployeeBusinessLayer obj = new EmployeeBusinessLayer();
obj.AddEmployee(empObj);
return RedirectToAction("Index");
}
}
}
Now we will add a "Create" view. To do this, right click on the "Create" action method and select "Add View" from the context menu. A new window will open, set the following attribute:
View name = "Create"
View engine = "Razor"
Select "Create Strongly-typed view" checkbox
Select "Employee" class, from "Model class" dropdownlist
Scaffold Template = Create
And click the "Add" button. You will get the following Create.cshtml file.
@model DataLayer.Employee
@{
ViewBag.Title = "Create";
}
<h2>Add new Employee</h2>
@using (Html.BeginForm())
{
@Html.AntiForgeryToken()
@Html.ValidationSummary(true)
<fieldset>
<legend>Employee</legend>
<div class="editor-label">
@Html.LabelFor(model => model.EmpID)
</div>
<div class="editor-field">
@Html.EditorFor(model => model.EmpID)
@Html.ValidationMessageFor(model => model.EmpID)
</div>
<div class="editor-label">
@Html.LabelFor(model => model.Name)
</div>
<div class="editor-field">
@Html.EditorFor(model => model.Name)
@Html.ValidationMessageFor(model => model.Name)
</div>
<div class="editor-label">
@Html.LabelFor(model => model.Gender)
</div>
<div class="editor-field">
@Html.DropDownList("Gender", new List<SelectListItem>{
new SelectListItem { Text = "Male", Value = "Male" },
new SelectListItem { Text = "Female", Value = "Female" } },
"Select Gender")
@Html.ValidationMessageFor(model => model.Gender)
</div>
<div class="editor-label">
@Html.LabelFor(model => model.Address)
</div>
<div class="editor-field">
@Html.EditorFor(model => model.Address)
@Html.ValidationMessageFor(model => model.Address)
</div>
<div class="editor-label">
@Html.LabelFor(model => model.Salary)
</div>
<div class="editor-field">
@Html.EditorFor(model => model.Salary)
@Html.ValidationMessageFor(model => model.Salary)
</div>
<p>
<input type="submit" value="Create" />
</p>
</fieldset>
}
<div>
@Html.ActionLink("Back to List", "Index")
</div>
"Create.cshtml" file will be added in View → "Employee" folder. You will get the following "Script" file at the bottom of the view.
@section Scripts {
@Scripts.Render("∼/bundles/jqueryval")
}
Please delete it. We will discuss this script in a later chapter.
Run the application and navigate to the following URL
http://localhost:57075/Employee/Index (Port number may be different)
You will get a form that has textboxes and a create button.
For “Gender” field, it should be dropdownlist instead of a text box. To implement this, replace the following line
@Html.EditorFor(model => model.Gender)
with
@Html.DropDownList("Gender", new List<SelectListItem>
{
new SelectListItem { Text = "Male", Value="Male" },
new SelectListItem { Text = "Female", Value="Female" }
}, "Select Gender")
Now click on "Create New" link. You will get the following output.
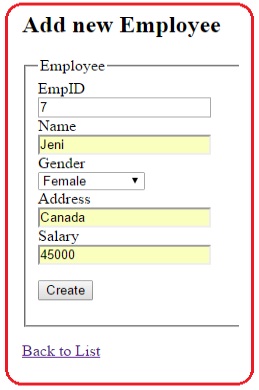
After filling the form, click the create button. The record will be inserted in the database and again the index page will open with updated record.
There are another two approaches that you can use for inserting the record in database.
In the first method you can remove the FormCollection and pass Employee object as a parameter. Please refer to the code given below. ModeState contains the state of model. ModelState.IsValid returns the true if everything is fine otherwise it will give you the error.
[HttpPost]
public ActionResult Create(Employee empObj)
{
if (ModelState.IsValid)
{
EmployeeBusinessLayer obj = new EmployeeBusinessLayer();
obj.AddEmployee(empObj);
return RedirectToAction("Index");
}
return View();
}
In the second method you can totally get rid of parameter. Here important point is that both method names are same as Create. So for performing method overloading , change the code as below.
[HttpPost]
[ActionName("Create")]
public ActionResult CreatePost()
{
if (ModelState.IsValid)
{
Employee empObj = new Employee();
UpdateModel(empObj);
EmployeeBusinessLayer obj = new EmployeeBusinessLayer();
obj.AddEmployee(empObj);
return RedirectToAction("Index");
}
return View();
}
UpdateModel() is a Controller helper method that inspects all HttpRequest input such as QueryString, Cookies, posted form data and populate the employee object.