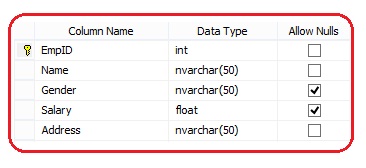
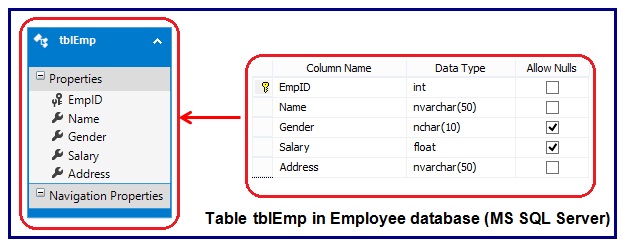
We have created the above table in SQL Server and table name is tblEmp. DataBase Name is Employee.
Create a new application in MVC. Give the name of application according to your need.
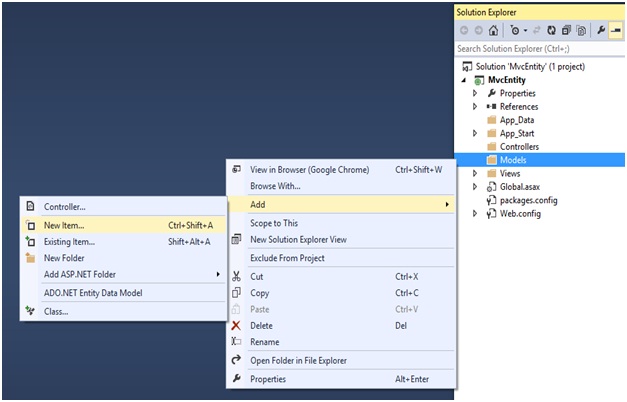
Right click on Model folder then Add → New Item.
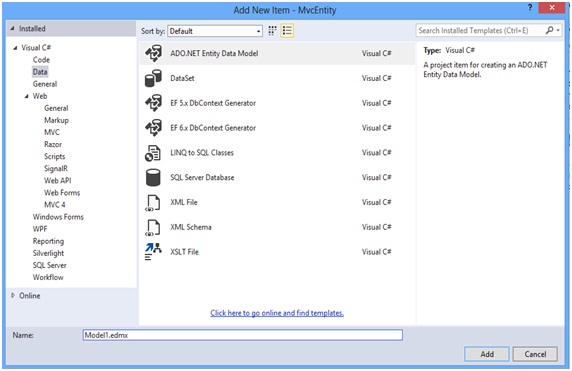
In the Add New Item dialog, select the Data category. Now select ADO.NET Entity Data Model template, give the Entity Data Model the name EmployeeDBModel.edmx. Click the add button.
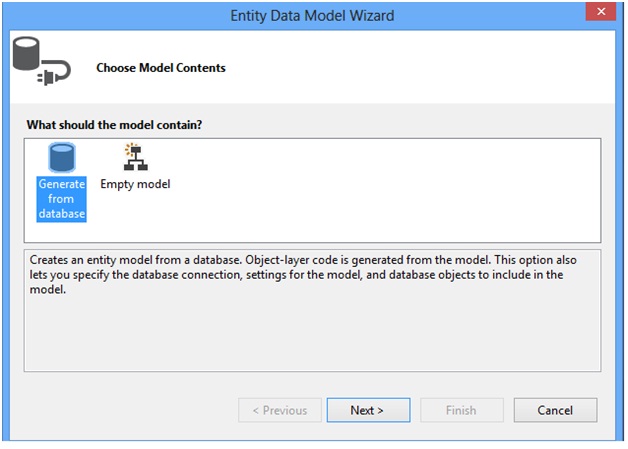
It will open the Entity Data Model Wizard. Choose the Generate from a database option and click the Next button.
In the next step, create the new connection.

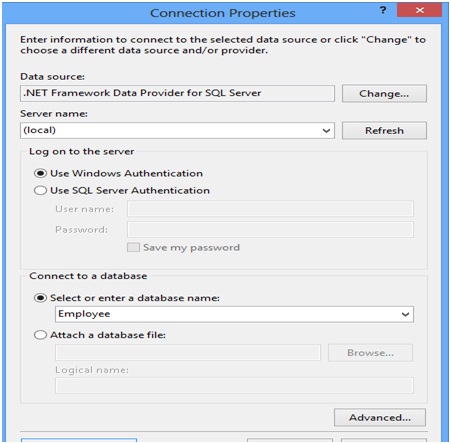
Set the following properties
Data source: .Net Framework data Provider for SQL server
Server name: (local)
Database Name: Employee
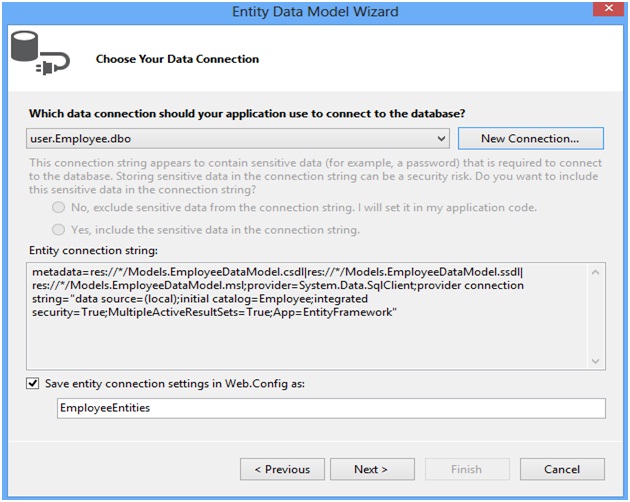
Save entity connection settings in web.config as: EmployeeDBContext in place of EmployeeEntities. You can provide any name in place of EmployeeEntities. Our database name is Employee that’s why default name is came as EmployeeEntities.
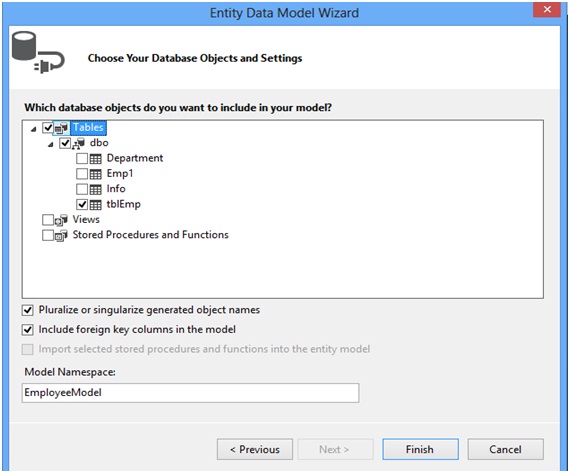
Click the Next button and choose your database object and click the Finish button.
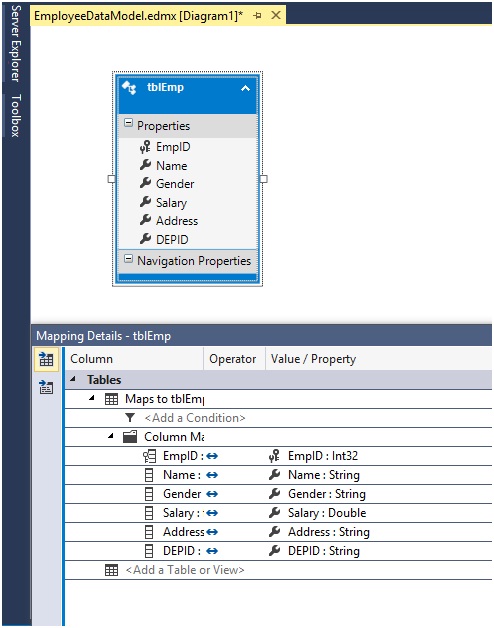
After completing these steps, the ADO.NET Entity Data Model Designer opens.
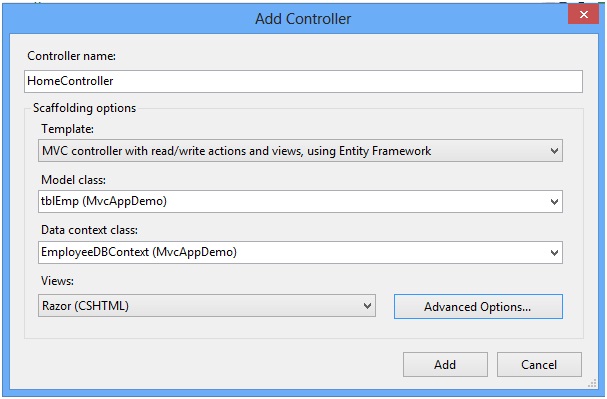
Now you can create controller and view easily. Add a new controller and name it as HomeController with the following option as given below.
using System.Data;
using System.Linq;
using System.Web.Mvc;
namespace MvcAppDemo.Controllers
{
public class HomeController : Controller
{
private EmployeeDBContext db = new EmployeeDBContext();
//
// GET: /Home/
public ActionResult Index()
{
return View(db.tblEmp.ToList());
}
//
// GET: /Home/Details/5
public ActionResult Details(int id = 0)
{
tblEmp tblemp = db.tblEmp.Find(id);
if (tblemp == null)
{
return HttpNotFound();
}
return View(tblemp);
}
//
// GET: /Home/Create
public ActionResult Create()
{
return View();
}
//
// POST: /Home/Create
[HttpPost]
[ValidateAntiForgeryToken]
public ActionResult Create(tblEmp tblemp)
{
if (ModelState.IsValid)
{
db.tblEmp.Add(tblemp);
db.SaveChanges();
return RedirectToAction("Index");
}
return View(tblemp);
}
//
// GET: /Home/Edit/5
public ActionResult Edit(int id = 0)
{
tblEmp tblemp = db.tblEmp.Find(id);
if (tblemp == null)
{
return HttpNotFound();
}
return View(tblemp);
}
//
// POST: /Home/Edit/5
[HttpPost]
[ValidateAntiForgeryToken]
public ActionResult Edit(tblEmp tblemp)
{
if (ModelState.IsValid)
{
db.Entry(tblemp).State = EntityState.Modified;
db.SaveChanges();
return RedirectToAction("Index");
}
return View(tblemp);
}
//
// GET: /Home/Delete/5
public ActionResult Delete(int id = 0)
{
tblEmp tblemp = db.tblEmp.Find(id);
if (tblemp == null)
{
return HttpNotFound();
}
return View(tblemp);
}
//
// POST: /Home/Delete/5
[HttpPost, ActionName("Delete")]
[ValidateAntiForgeryToken]
public ActionResult DeleteConfirmed(int id)
{
tblEmp tblemp = db.tblEmp.Find(id);
db.tblEmp.Remove(tblemp);
db.SaveChanges();
return RedirectToAction("Index");
}
protected override void Dispose(bool disposing)
{
db.Dispose();
base.Dispose(disposing);
}
}
}
It will create , Index.cshtml, Edit.cshtml, Delete.cshtml, Details.cshtml, Create.cshtml files for you.
The overall folder and files structure will be as given below.

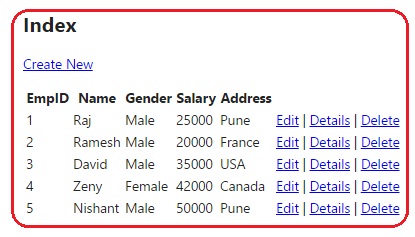
Run the application, you will get the output as given below.