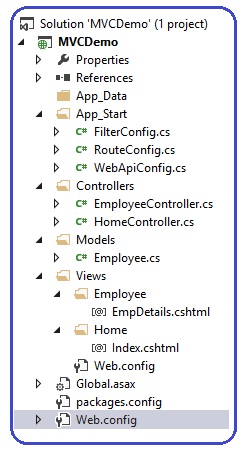
After adding the Model, View, and controller the folder structure will as given image. Here
Model is Employee.cs
View is EmpDetails.cshtml
Controller is EmployeeController.cs
Add Model Class
In Solution Explorer, right click the Modelsfolder, select Add, and then select New Item. In the Add New Item dialog, select Class then name the class "Employee". Add the properties to the Employee class:using System;
using System.Collections.Generic;
using System.Linq;
using System.Web;
namespace MVCDemo.Models
{
public class Employee
{
public int EmpID { get; set; }
public string EmpName { get; set; }
public string Gender { get; set; }
public string City { get; set; }
public double Salary { get; set; }
}
}
Add the controller
- Re-Build your project: Select Debug, and then Build MVCDemo from the menu.
- In the Solution Explorer, right-click the Controllers folder, and select Add and then Controller
- Set controller name as EmployeeController
- Select template: Empty MVC controller
- Click Add
using System;
using System.Collections.Generic;
using System.Linq;
using System.Web;
using System.Web.Mvc;
using MVCDemo.Models;
namespace MVCDemo.Controllers
{
public class EmployeeController : Controller
{
public ActionResult EmpDetails()
{
Employee emp=new Employee()
{
EmpID=10,
EmpName="Raj",
Gender="Male",
City="Pune",
Salary=25000
};
return View(emp);
}
}
}
Use namespace MVCDemo.Models, so there is no need to write fully qualified name every time.
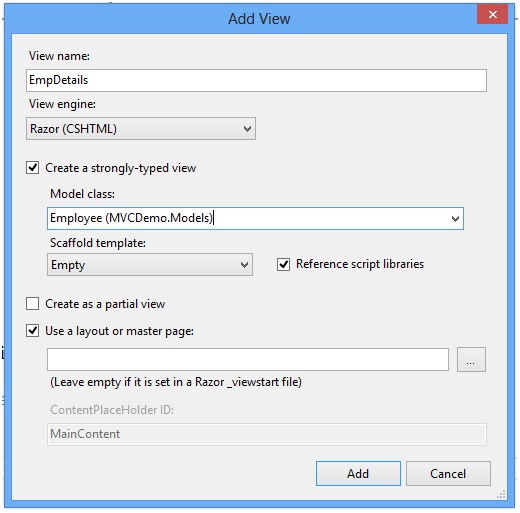
Add the View
- Build the application.
- Right click on the action method EmpDetails(), of controller EmployeeController.
- Select view engine as Rozor(CSHTML).
- Check the checkbox “create a strongly typed view”
- Select the Employee (MVCDemo.Models) from the dropdown list.
- Click on Add button.
@model MVCDemo.Models.Employee
@{
ViewBag.Title = "EmpDetails";
}
<h2>Employee Details</h2><br />
<style>
table, th, td
{
border: 1px solid grey;
border-collapse: collapse;
padding: 5px;
}
table tr:nth-child(odd)
{
background-color: #ffe6e6;
}
table tr:nth-child(even)
{
background-color: #ccffcc;
}
</style>
<table style="font-family:Arial; font-size:medium; color:darkblue">
<tr>
<td><b>EmpID</b></td>
<td >@Model.EmpID</td>
</tr>
<tr>
<td><b>EmpName</b></td>
<td>@Model.EmpName</td>
</tr>
<tr>
<td><b>Gender</b></td>
<td>@Model.Gender</td>
</tr>
<tr>
<td><b>City</b></td>
<td>@Model.City</td>
</tr>
<tr>
<td><b>Salary</b></td>
<td>@Model.Salary</td>
</tr>
</table>
On executing the application you will get the output as follows:
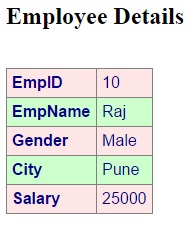
In the above example We used hard coded data as database, but in real world application the data came from persistent medium, such as Microsoft sql server.
In model object We have created a class name employee and their properties. These employee properties are initialized manually in controller. Note that you have to pass the employee object in return statement of view.
Please keep in mind that when you run the application, the default view will be executed. You have to explicitly write the name of controller and its action method as follows.
http://localhost:57498/Employee/EmpDetails
Probably the port number will be different. The controller responds to the URL request. It gets the data from model and provides to view object. After getting the data view renders the page.